Phaser Editor v3-alpha released
February 28, 2020 - Posted in release
Hi,
Today we are releasing Phaser Editor 2D v3!
This is an Alpha version and it is only available to paid clients. If you purchased a Phaser Editor license, no matter if it expired or not, then, please, check this post in the Gumroad’s Phaser Editor 2D page, to get access to the files.
As you may know, this version is a complete re-write of the editor, but using web technologies. This means, now the IDE runs in the browser, with a small backend running in a server (or your localhost).
In the next sections, we explain some steps to run the editor and perform basic tasks. We assume you have experience with previous versions of the editor, so we are not going to explain in detail.
If you are not a paid client, please, keep in contact with us, because we want to release a public version in a few weeks. We need to add certain features and write basic documentation.
Feedback
The code of the editor is versioned in two repositories. One for the backend and other for the frontend. The backend deals with the licenses and its code is private. The frontend is developed in TypeScript and its code is public:
github.com/PhaserEditor2D/PhaserEditor2D-v3/
Please, use that repository to request features and file bugs. Together with the public release, we should provide a guide to build and contribute to the code.
Download
This alpha release is only available to paid clients. [https://gumroad.com/boniatillo_com/p/phaser-editor-v3-released-for-paid-clients).
Note you should download the file for your platform. Windows, macOS, and Linux are supported.
Run the editor
The editor is portable, it does not need any special installation process. Just download the distribution file and unzip it in a folder where you have read/write permissions.
This is the structure of the editor files:
PhaserEditor2D/
    PhaserEditor2D.exe
    editor/
        ...
The PhaserEditor2D.exe file is the editor server. The editor/ folder contains all the client/HTML files.
To run the editor open the terminal (or cmd) of your OS and write:
$ cd PhaserEditor2D
$ PhaserEditor2D.exe -desktop
In macOS and Linux:
$ cd PhaserEditor2D
$ ./PhaserEditor2D -desktop
macOS/Linux users: if the file PhaserEditor2D does not run, please, set execution permissions to it:
$ chmod +x PhaserEditor2D
$ ./PhaserEditor2D -desktop
The -desktop option tells the editor to enable the integration with the local OS:
- Launches the default browser and open the editor.
- Denies all external connections.
- Allows, in the Files view of the IDE, to open the OS file manager in the selected location.
If you omit the -desktop option, then it runs the editor server in “public” mode, which means, it assumes may be connections from external hosts.
To see all the server options, write:
$ PhaserEditor2D -help
Select the workspace
By default, the editor server creates a workspace folder in the user home: <user-home>/PhaserEditor2D_Projects. This folder is used to store the projects. If you need to store the projects in another folder, then use the -ws option:
$ PhaserEditor2D -desktop -ws path/to/my/workspace
Please, start with an empty folder. This version of the editor is not compatible with previous versions.
Unlock the editor
By default, the editor runs in the Free mode. This mode only enables 70 files per project. If you exceed that limit, the IDE will show you no files in the project.
To removes that limit, you should purchase a license and unlock the editor. When you purchase a license, a key is sent to your email. Use that key to unlock the editor:
$ PhaserEditor2D -lickey YOUR-KEY-HERE

Phaser Editor 2D - v3.0.0-alpha

Unlocking the editor. This requires an Internet connection...

Congratulations! Phaser Editor 2D was unlocked successfully!
Note: the generated license file is only for personal use.
That command generates a PhaserEditor2D.lic file that is your license activation file. Don’t delete it, because the editor will check on it each time it starts.
Create a new project
When you start the server with the -desktop option, it opens the default browser at http://127.0.0.1/editor, the address to the IDE.
By the way, please, use a modern, updated browser. We test the editor only in the latest version of Opera, Firefox and Google Chrome.
The first it shows is a dialog to open a project or create a new one. But, because this is your first time and the workspace is empty, it shows the New Project dialog:

This dialog shows the project templates. Select one template and write the name of the project.
For this guide, we select the Demo - JavaScript - Flying Dragon template.
Press the Create Project button and wait for the loading of the IDE.
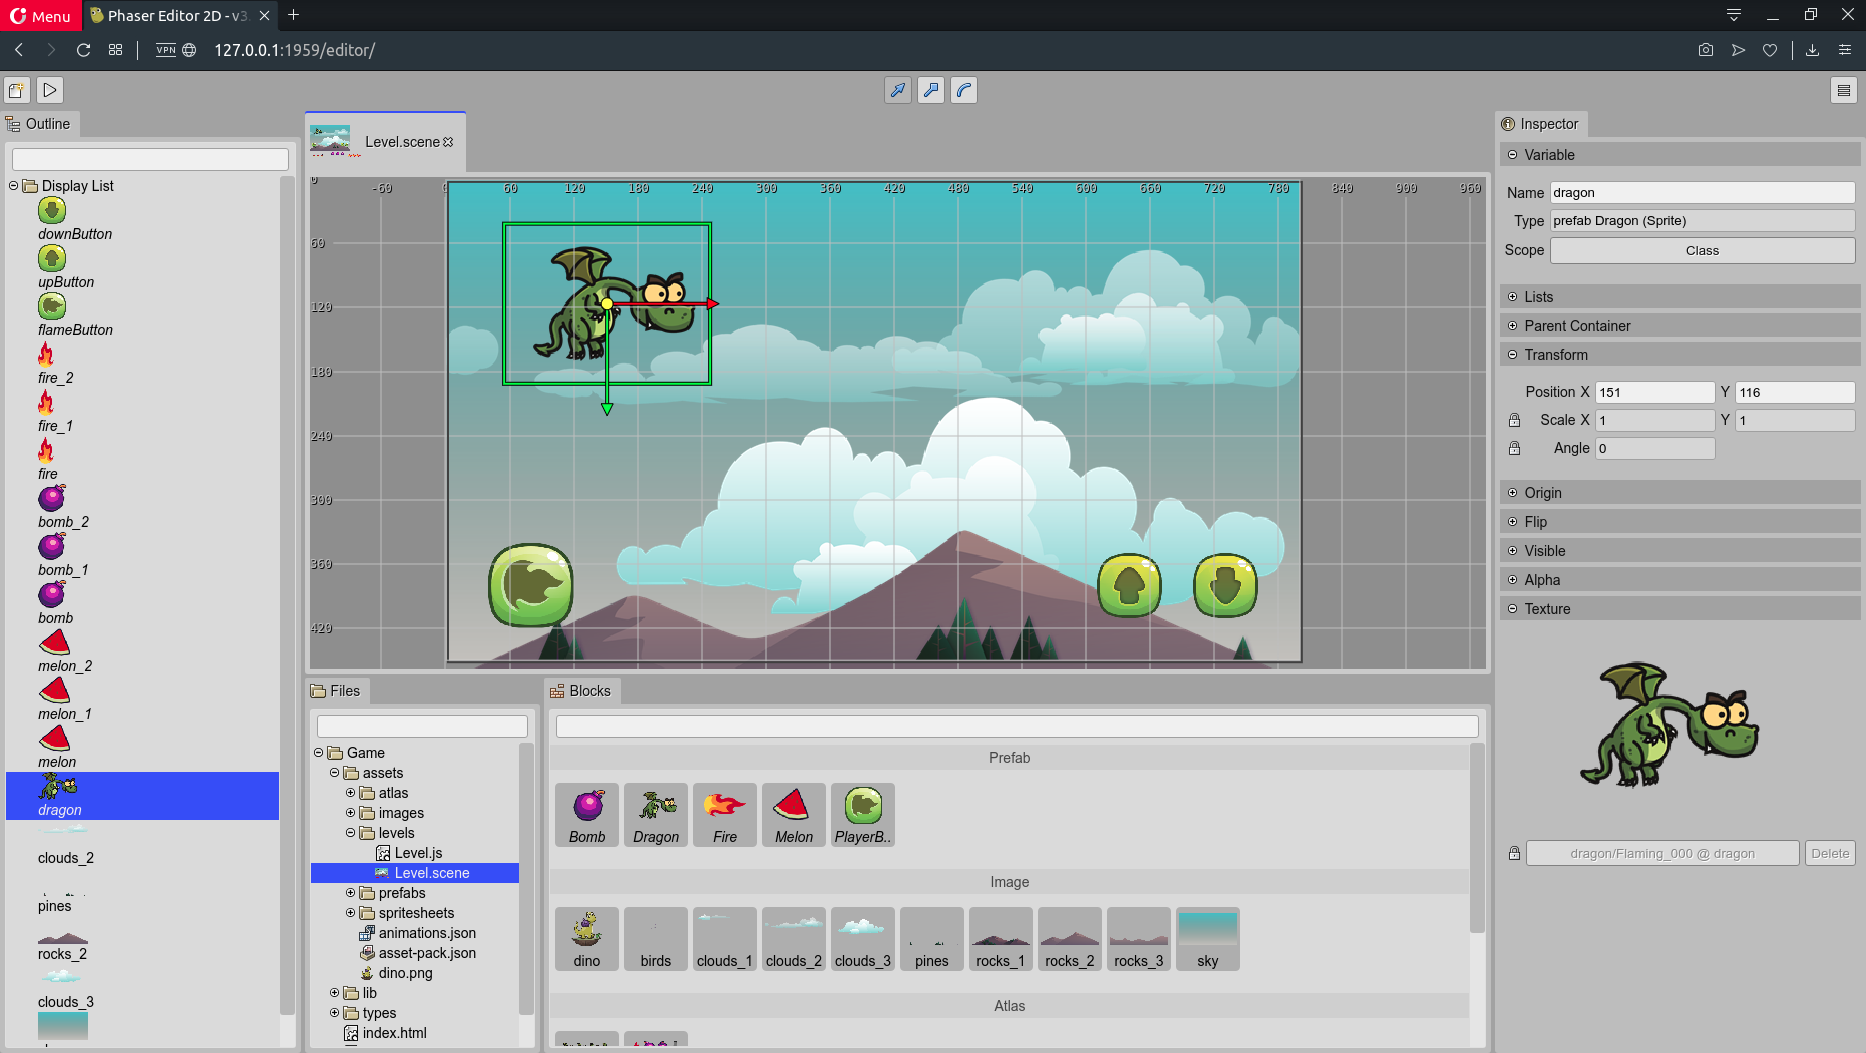
The IDE is loaded, navigate in the Files view to the file assets/scenes/levels/Level.scene and double click on it to open it in the Scene Editor, that is the most important part of the IDE.
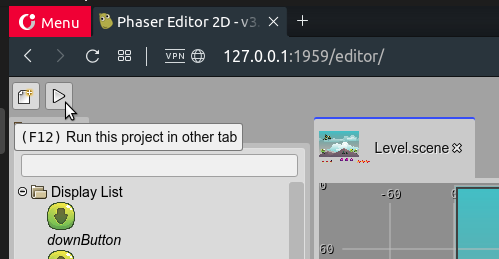
Play the project
To see your game in action, click on the Play button of the main toolbar or press the F12 key:
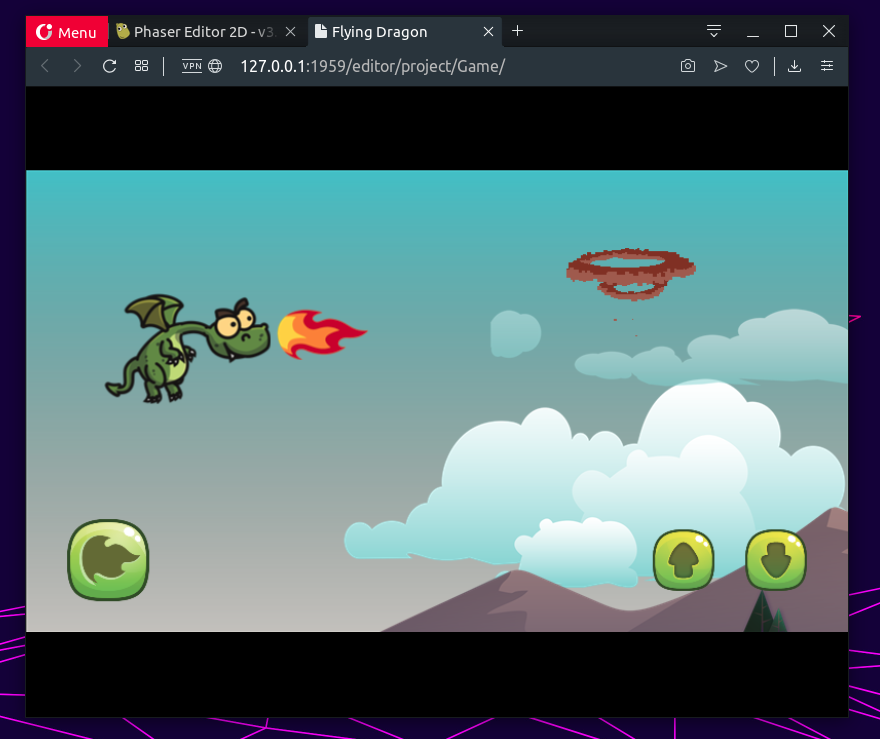
It opens your game in another tab:
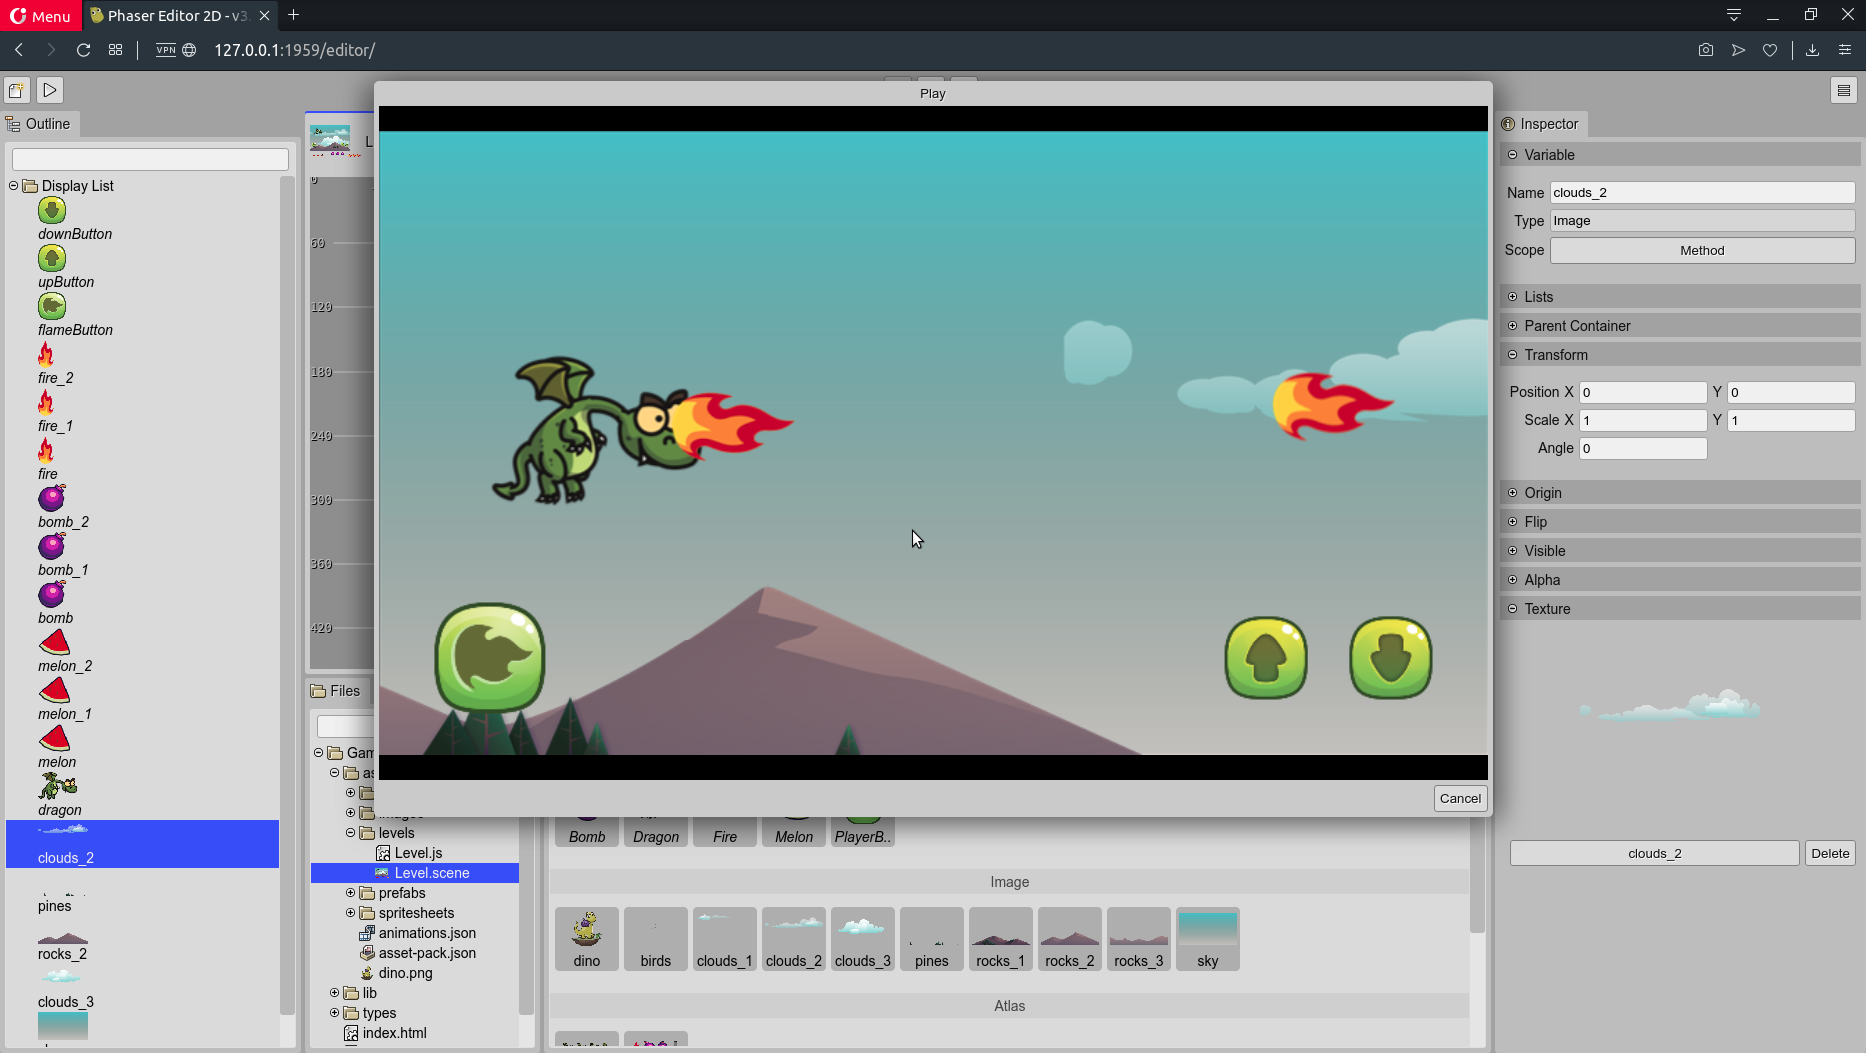
Another way to run your game is by pressing the F10 key. It creates a dialog and runs the game in a frame. This is good for a quick test, but we recommend to run it in another tab, it allows you to open the Developer Console and check if your game is logging any error.
Scene Editor
The Scene Editor is similar to the editor in Phaser Editor v2. The Outline view shows the hierarchy of the objects. The Inspector view shows the properties of the selected objects, or the properties of the scene if no object is selected. The Blocks view shows the assets you can drop into the scene. Remember, these assets are defined in an Asset Pack file.
In v3 there is a new type of asset: the prefabs.
Prefabs
In this version, we introduced the prefabs. This is a concept present in v1 but not in v2. In this version, the prefabs are more powerful that v1, you can create a prefab of any type of object and you can create prefab variants.
A prefab is just a scene file that can be used to create a custom object type. This means, that you can instantiate objects of a prefab (custom type).
Because a prefab file is a scene file, you can add many objects to it, but only the top-most object is used as the “template” object.
Create a prefab
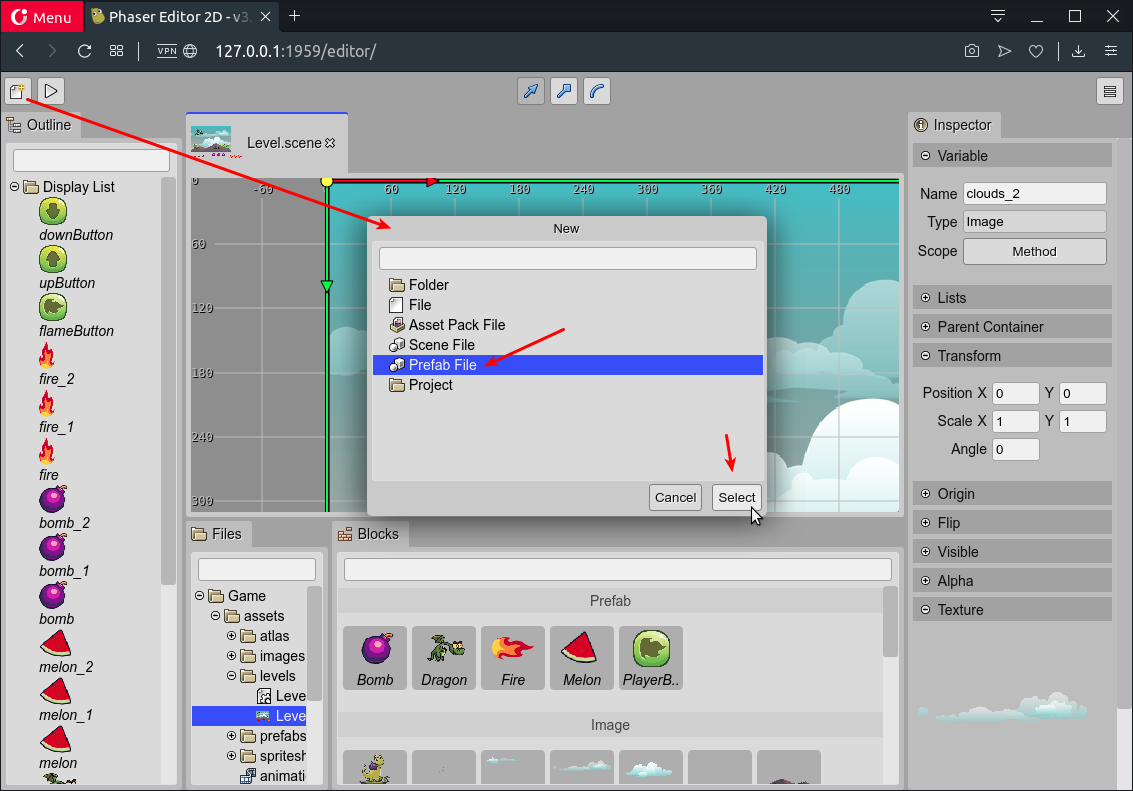
To create a prefab, click on the New File button and select the Prefab File option:
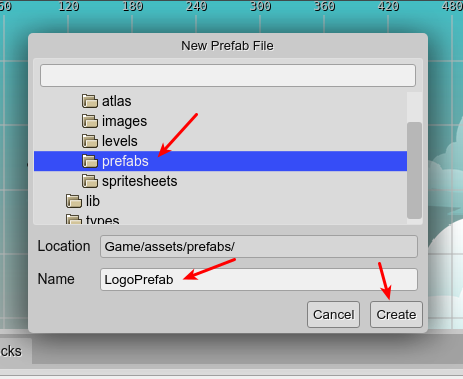
It opens the New Prefab File dialog. Select the folder and name for the new prefab, and press the Create button:
The prefab file is created and opened in the Scene Editor. By default it is empty, so you should add the prefab object to it. Let’s add the dino image present in the Blocks view:
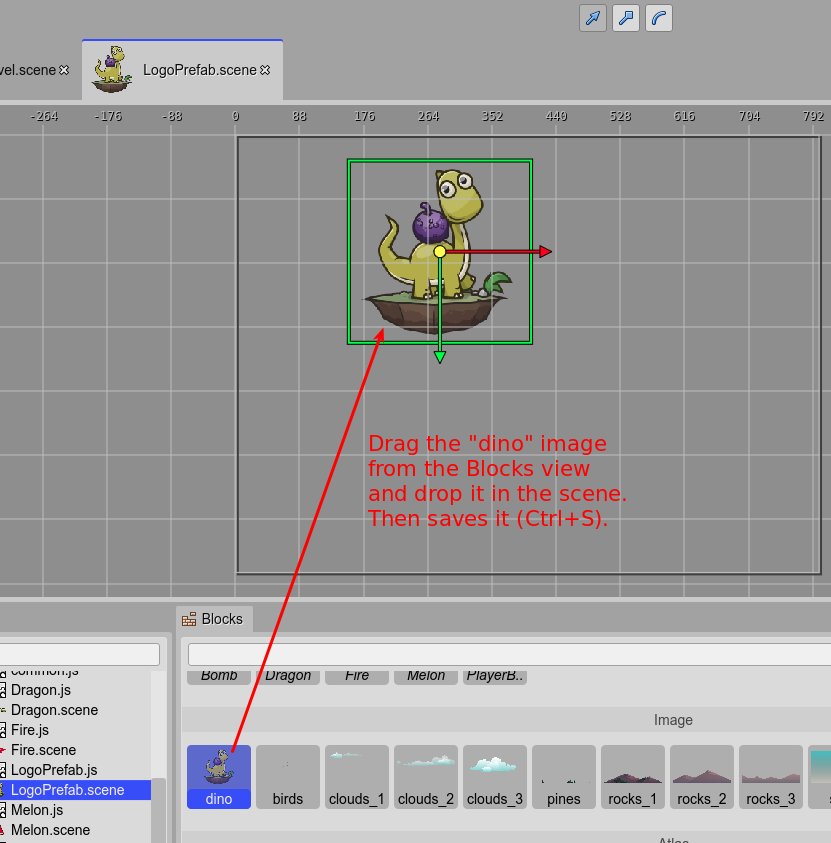
Saves the changes (Ctrl+S) and see how the icon of the editor will show the scene image. Try adding another image and save. You will see the icon is updated with the new image. Only the top-most object of the scene is considered as the prefab object.
WARNING: Don’t forget to load the prefab’s compiler output file (LogoPrefab.js in this example). You can load it with a script tag in the index.html file or in the Asset Pack file asset-pack.json. For now, we recommend loading it in the index.html file because the pack loader of Phaser loads the scripts in parallel and it can create dependencies errors. This problem will be addressed in the next release, using the scripts loader of Phaser.
Create an instance of a prefab
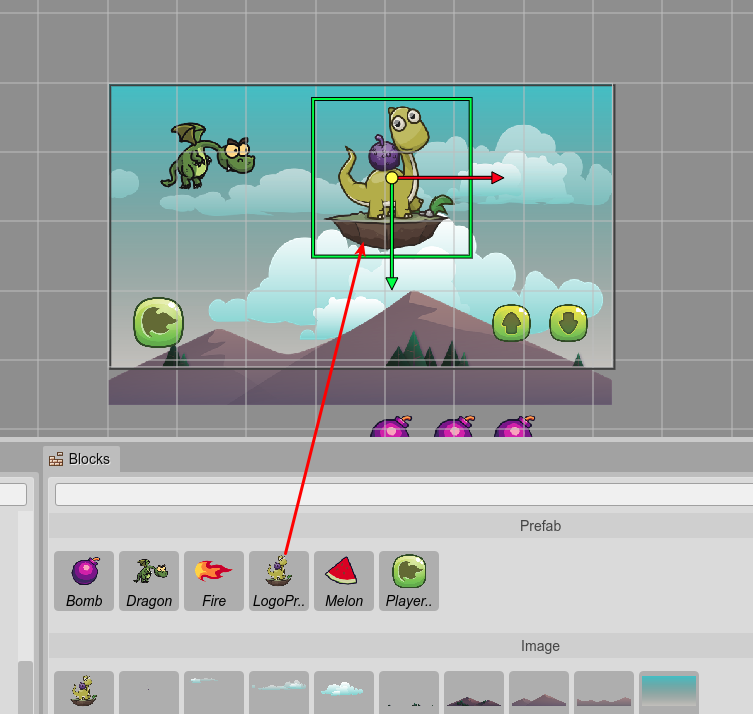
To create an object with a prefab, or a prefab instance, just drag the prefab from the Blocks view and drop it into the scene:
Note the difference between a prefab and a prefab instance. A prefab is a type, a class, and a prefab instance is an instance of that type.
When you see the object’s properties of a prefab instance in the Inspector view, all of them are locked. Only some properties are not locked, those are editor-dedicated properties, like those in the Variable section.
Well, for logic reasons, the Transformation properties are not locked either.
A locked property means that it keeps the same value of the prefab and it cannot be changed. This means, that if that property, let’s say the scale, is changed in the prefab, then all the prefab instances will get the new value.
To change the value of a locked property you should unlock it, by pressing in the “lock” icon next to the property. Then, the value set to an unlocked property is not updated if the prefab value is changed.
You can get a better idea of how it works in this video we did some time ago to demonstrate prefabs:
Also, we recommend seeing the generated code. The code talks by itself. It is something we love from Phaser Editor, there is no black magic, the scenes are compiled to legible JavaScript (or TypeScript) code so you may know exactly how it works at the run-time.
Create an object
To create an object in the scene, just select an image or prefab in the Blocks view and drag it into the scene. If it is an image or atlas frame, it will create an Image object. If it is a prefab, it will create a prefab instance.
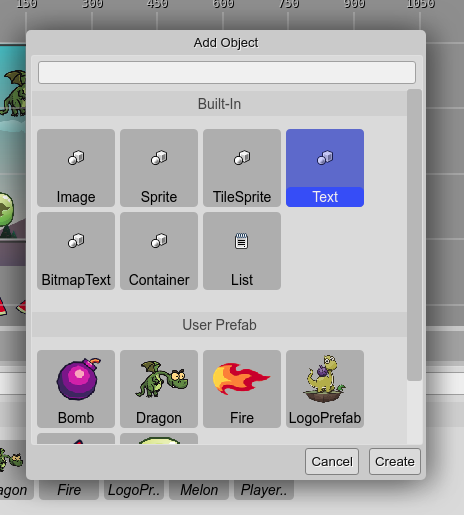
Also, you can open the Add Object dialog by pressing the A key or selecting the Add Object option in the context menu.
This dialog shows all the supported object types and the prefabs (that are like types, did we say it before?). Select a type press the Create button. A new object will be added to the center of the scene.
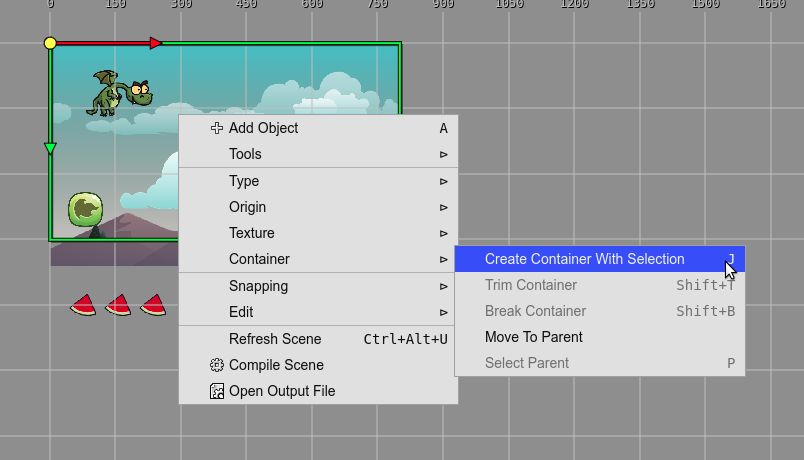
Context menu
A context menu is something requested by many users. In v2 we don’t provide it but it is back now in v3.
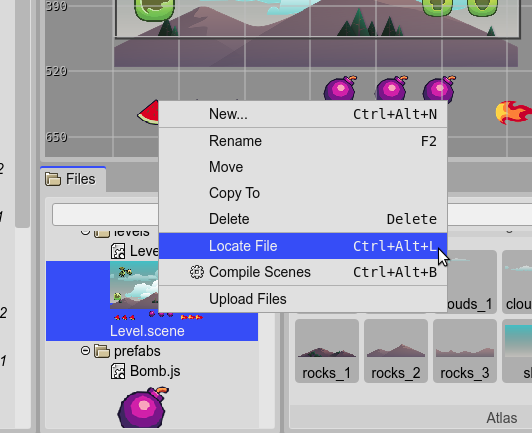
Just right-click in the scene and take a look at the options available in this menu. By philosophy, we should list here all the operations provided by the Scene Editor. It also displays the keys mapped to an operation.
Asset Pack Editor
Like in all the previous versions of Phaser Editor, it uses an Asset Pack file to define (or import) all the files (or asset files) required by the game. Phaser has a built-in loader for pack files so you can load them at any part of your game.
All project templates include an Asset Pack file, generally at assets/asset-pack.json. Open it in the Asset Pack Editor to import the assets of your game.
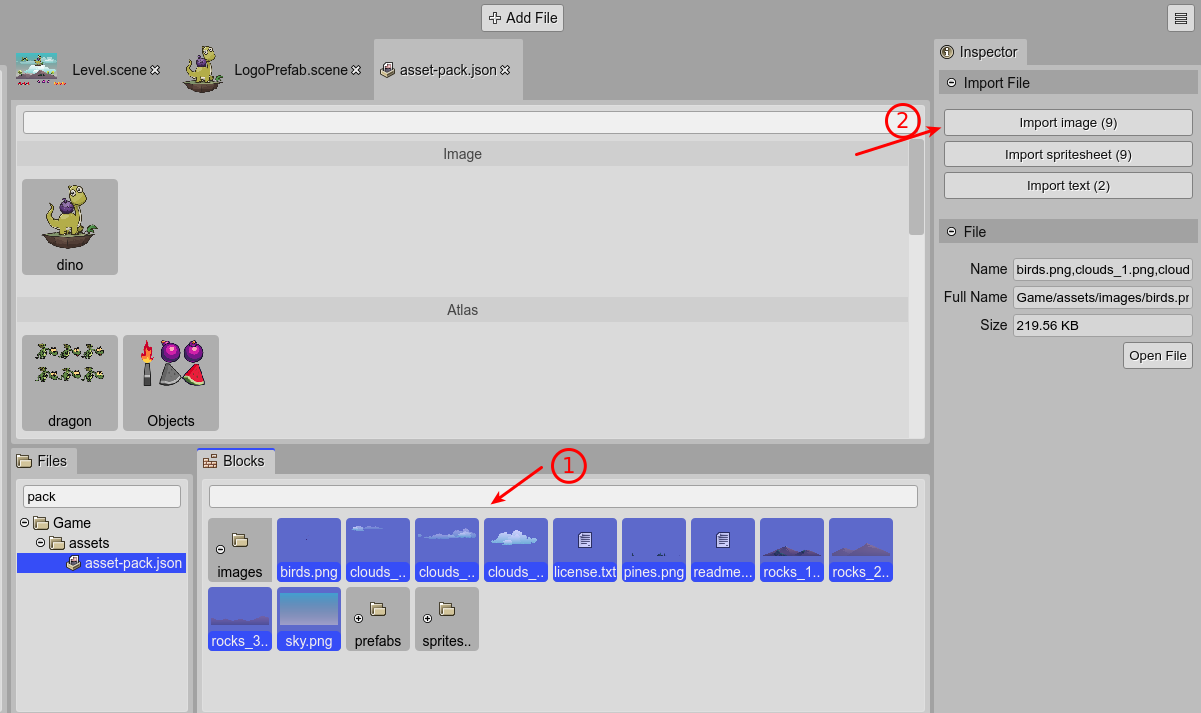
It works similarly to v2. The Blocks view displays all the files that are not included yet in the Asset Pack file so you can select them and import them using one of the “import buttons” of the Inspector view:
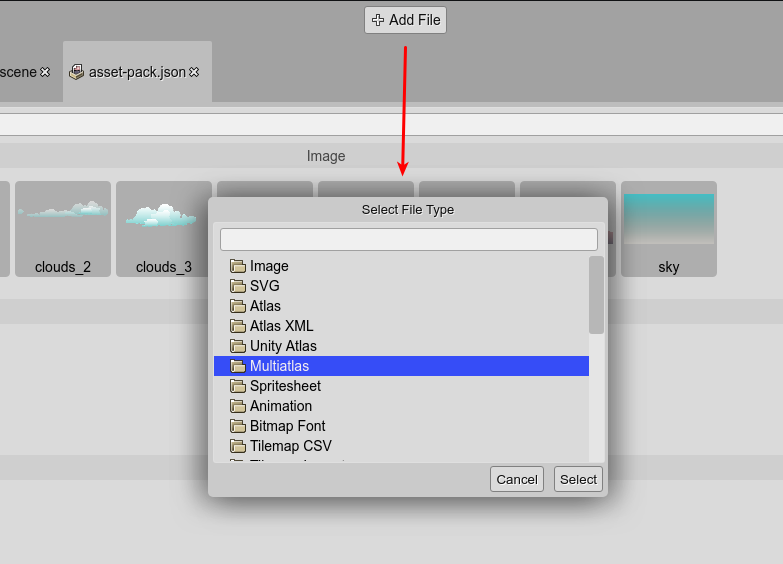
In addition, you can press on the Add File of the main toolbar of the IDE to open the Add File dialog. This dialog displays all the types of files supported by default in Phaser and guides you to import the files.
Add assets to an Asset Pack file in the Files view
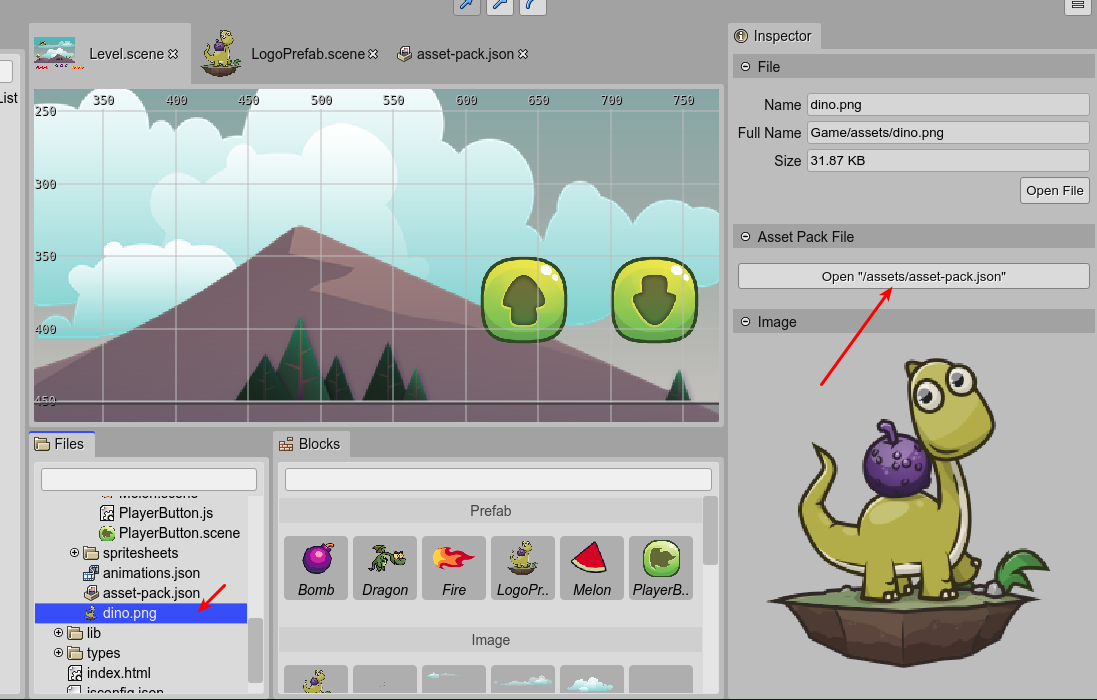
There is a new method to import the files into an Asset Pack file. When you select a file in the Files view, the Inspector view shows the Asset Pack File section. If the selected file is part of an any Asset Pack, then this section shows a button to open that Asset Pack file:
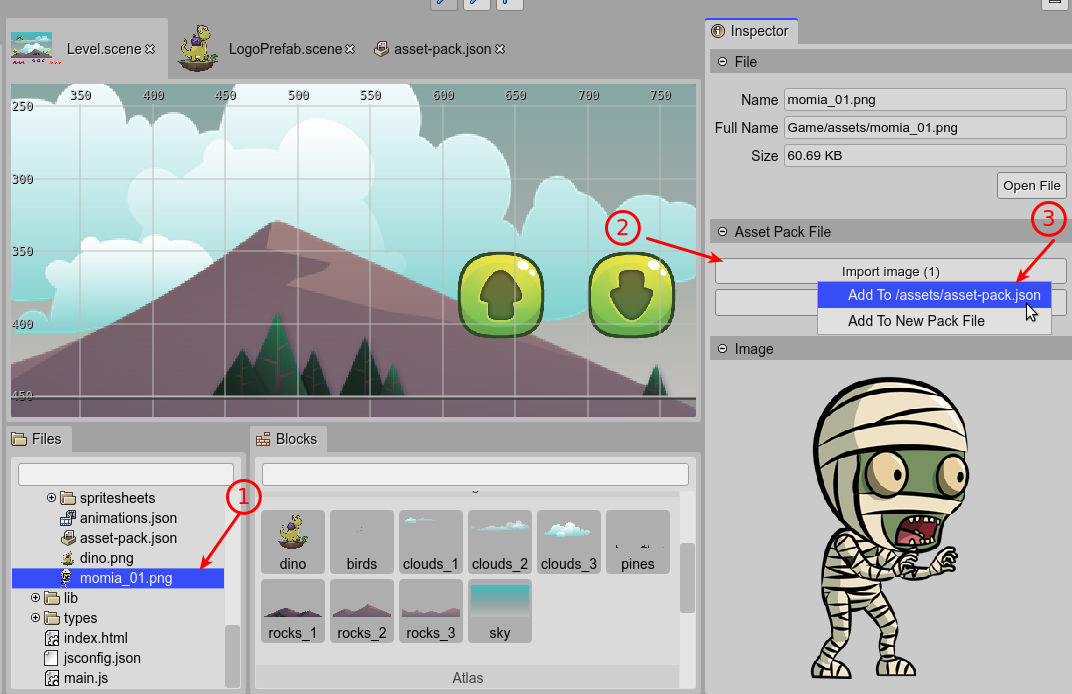
If the selected file is not part of any Asset Pack file, then the Asset Pack File section shows a button to add the file to any of the Asset Pack files available in the project:
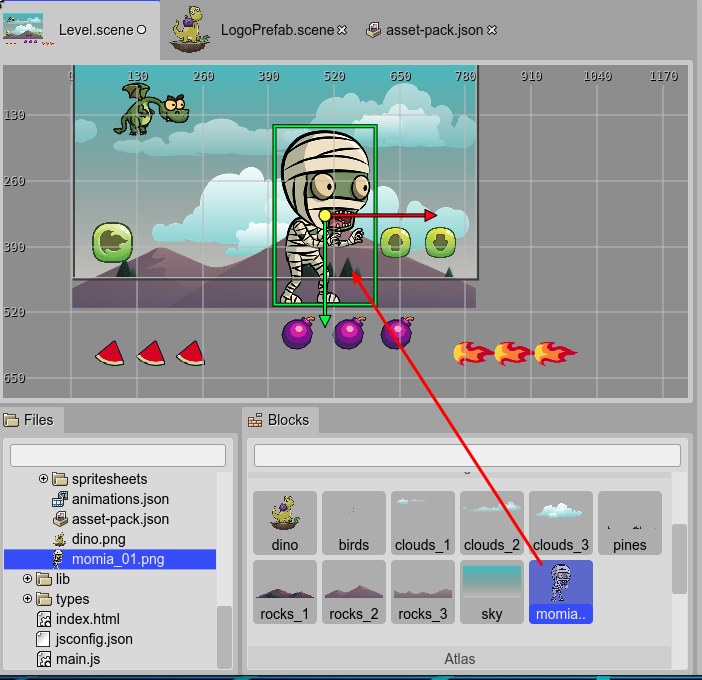
Note that after import the file, it will be displayed in the Blocks view of the Scene Editor:
Storage concepts
As the majority of the web applications, one part of Phaser Editor v3 runs in a server and other in the browser of a remote machine. This forced us to create an abstraction layer of the resources of a project. Let’s see some key concepts about it:
-
The files are stored in the server, but the editor keeps a memory cache of them in the browser. This cache is created by demand.
- Important: don’t add huge files to your project or a lot of unneeded files. The common is that HTML5 games don’t use too many resources. If other tools related to your game requires a lot of files, keep them in a separate folder, outside the Phaser Editor project.
-
The files in the server are updated each time the IDE modifies a resource in the client.
-
If the files in the server are modified externally, by a tool (like the TypeScript compiler) or manually (like adding new image files), then the client cache will be updated when:
-
The editor page is focused.
-
The user requests a project reload (
Ctrl+Alt+R). This operation is faster than reloading the whole web page because only the project files will be requested (and by demand).
-
-
The files with a name that starts with a dot (
.) or are part of anode_modulesfolder are ignored by the server and the client never displays them.
Code editor
Phaser Editor v3 uses the third-party Monaco editor to edit the text files. We first tried to provide advance intellisense running the Language Server in the browser but in the end, we decided it is not a good idea.
This means, what you get is a basic editor. For a richer experience, you should edit the text files (HTML, CSS JavaScript, TypeScript…) in an external editor.
We recommend Visual Studio Code. Actually, all the project templates include a tsconfig.json (or jsconfig.json) file ready to be used by Visual Studio Code.
If your server is running in a remote machine, then we recommend using the Visual Studio Code Server.
Maybe in the future, we can provide a better coding experience by running the Language Server if Visual Studio Code on the server-side, but it is not a priority now. What we maybe will do first is to implement some plugins to Visual Studio Code to help coding Phaser Editor games.
Miscellaneous
There are a couple of elements of the editor that we will mention here with few details:
Files view
This view shows the files of the project. You can rename, delete, move or upload files. Take a look at its context menu to get the list of operations you can perform.
In the editor, we try to show an in-line preview of the objects. In the Files view the images and the scenes are in-line previewed. You can zoom in/out the images with the Shift+MouseWheel combination.
Outline view
This view shows the hierarchy of objects present in the current editor of the IDE. If the Scene Editor is active it shows the scene objects. If the Asset Pack editor is active it shows the files declared in the Asset Pack file.
Often, the objects shown in this view are in-previewed, and you can zoom in/out them with the Shift+MouseWheel combination.
Inspector view
This view is connected with the active part of the IDE (view or editor) and displays the properties of the selected objects. In addition to the properties, it also provides some operations you can perform to the objects.
Main toolbar
The main toolbar of the IDE is divided into three parts (from left to right):
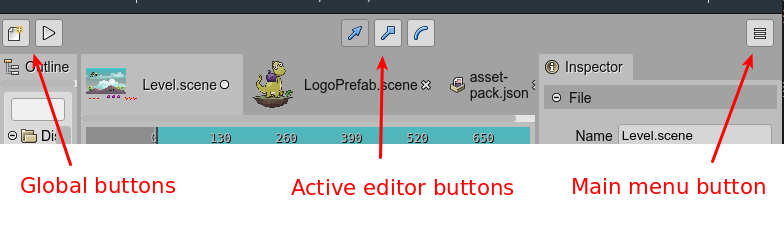
-
At the left it shows buttons to perform global actions like open the New File dialog or run the project.
-
At the center, it shows buttons provided by the active editor. In the case of the Scene Editor, these are transformation buttons. In the case of the Asset Pack Editor, it shows a button to open the Add File dialog.
-
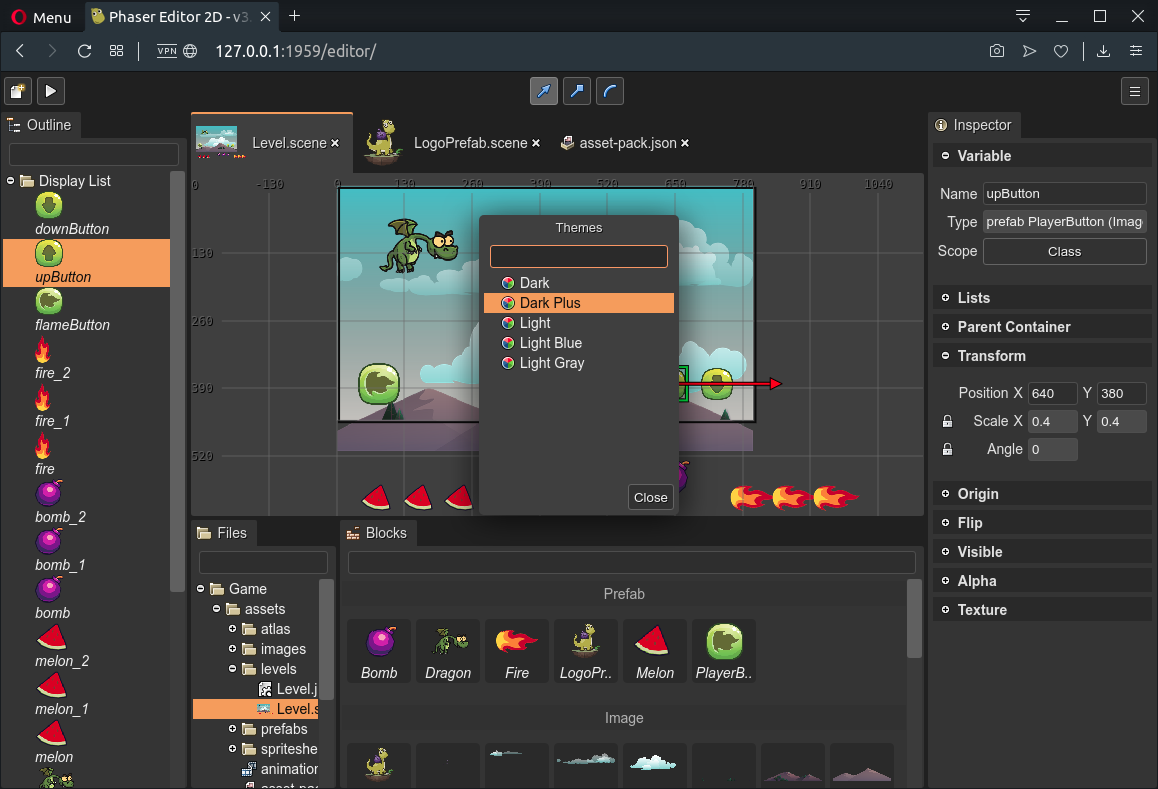
At the right, it shows the main menu. It shows general operations you can perform, like open a new project, change the color theme of the IDE or open the Command Palette dialog. Just take a look at it.
Bottom line
This was a short guide about Phaser Editor v3. There is a lot to explain but if you have previous experience with the editor and Phaser development you will get the idea. The purpose of this Alpha release is to get your appreciated feedback on bugs but what is more important on new (or not so new) ideas.
We want to add Prefab custom properties and write basic documentation before releasing the editor to the general public.
Keep in contact!
Arian
Tags: v3, alpha, paid-clients, paid clients