Phaser Editor v2 development progress (report 4)
November 02, 2018 - Posted in phaser-editor-v2
Hello,
We are working on the most exciting component of Phaser Editor v2: the scene editor. It is far to be ready, but there is some progress that we want to share.
In the past weeks, we had some issues that delayed the development, a merge of family issues, a flu, a travel to a conference and setting up a new place to work. We desire to work like a machine, to quickly move forward the editor, but life shows you one time and other that we are just humans :-) The fact that we are on a small island forces us to travel one time and other for different reasons, and when it happens the work is interrupted.
Each time a user (or a friend) ask us when we are going to publish v2, we say: in three months! it is because we have a lot of optimism, but we want to release something in this year, maybe something you can play with, something like a preview.
Scene editor
We decided to implement the scene editor again, from scratch. The main reason is that the old editor is based on JavaFX, and JavaFX does not allow to disable image interpolation, something that is terrible for pixel art. It is a significant amount of work, but the result worths it, right now we have a more flexible editor, and it runs faster.
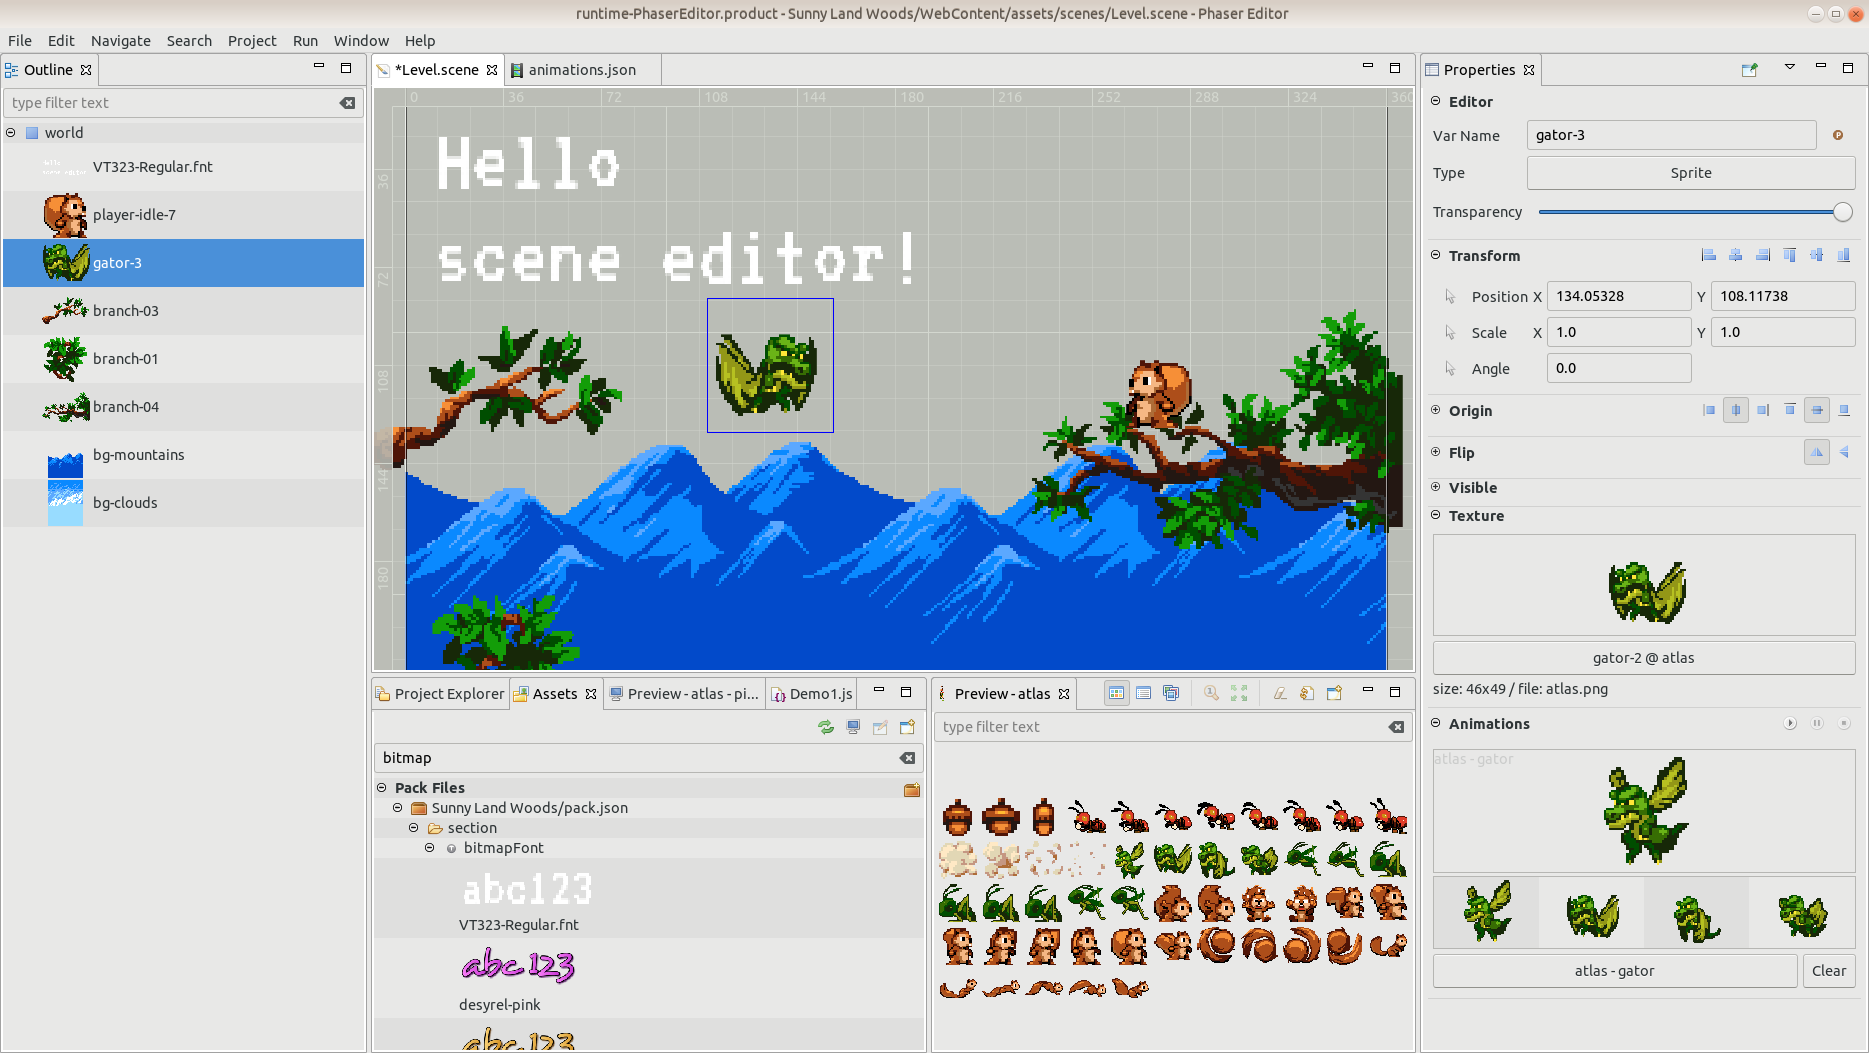
This is how the new scene editor looks:
(You can watch this video too)
Note that, as we did with the Asset Pack editor and the Animations editor, now the scene editor is linked to the Outline and Properties windows.
Outline window
The Outline window shows the tree of the objects of the scene. You can zoom in/out the Outline for a better preview of the objects (Shift+Mouse Scroll).
.png)
Properties window
Like the Outline window, the Properties window is a general purpose window that is linked to the IDE selection. When you select an object (or many objects) in the scene, the Properties window shows the editors for the properties of the objects.
In v1, the property editors were based on a tree table, in v2, we are using form-like editors, it looks modern and is more friendly, it gives more space for custom editors and toolbars.
We are making possible, from day 0, to edit many objects at the same time, something that is not present in v1.
Undo and Redo operations are available too, for all kind of changes.

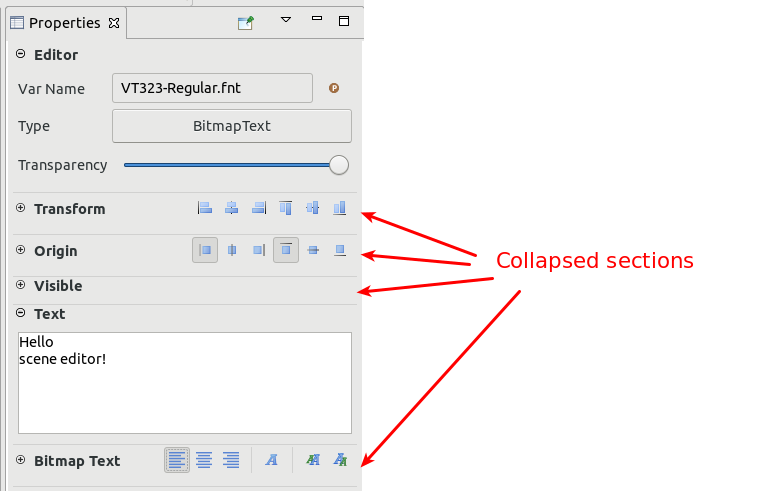
As you can see, the properties are grouped in sections. These sections can be collapsed, showing only the title and the toolbar.
Game objects
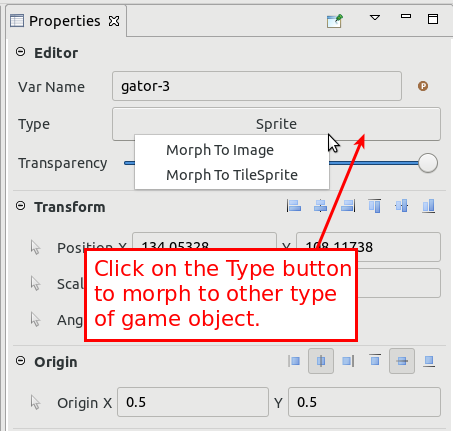
At the moment we just implemented a few game objects. As in v1, you can morph from one kind of object to other:
The objects are created when you drop an asset (from the Assets window or the Preview windows) into the scene.
When you drop a texture, it creates an Image object, then you can morph it to any other type, like Sprite or Tile Sprite (and others in the future, like Blob or Physics objects). However, we are thinking that maybe in the Asset Pack editor we can set a metadata with the default game object type for a texture, so it could save some time to the user. There are textures that can be used to create a different type of objects, but there are textures that we know that in our game will be used only to create one type of objects, for example, a background texture will be used always to create TileSprite objects in a platform game. So, the user can set, in the Asset Pack editor, the default type of the texture to TileSprite.
Image game object
From the Phaser docs:
“An Image is a light-weight Game Object useful for the display of static images in your game, such as logos, backgrounds, scenery or other non-animated elements. Images can have input events and physics bodies, or be tweened, tinted or scrolled. The main difference between an Image and a Sprite is that you cannot animate an Image as they do not have the Animation component.”
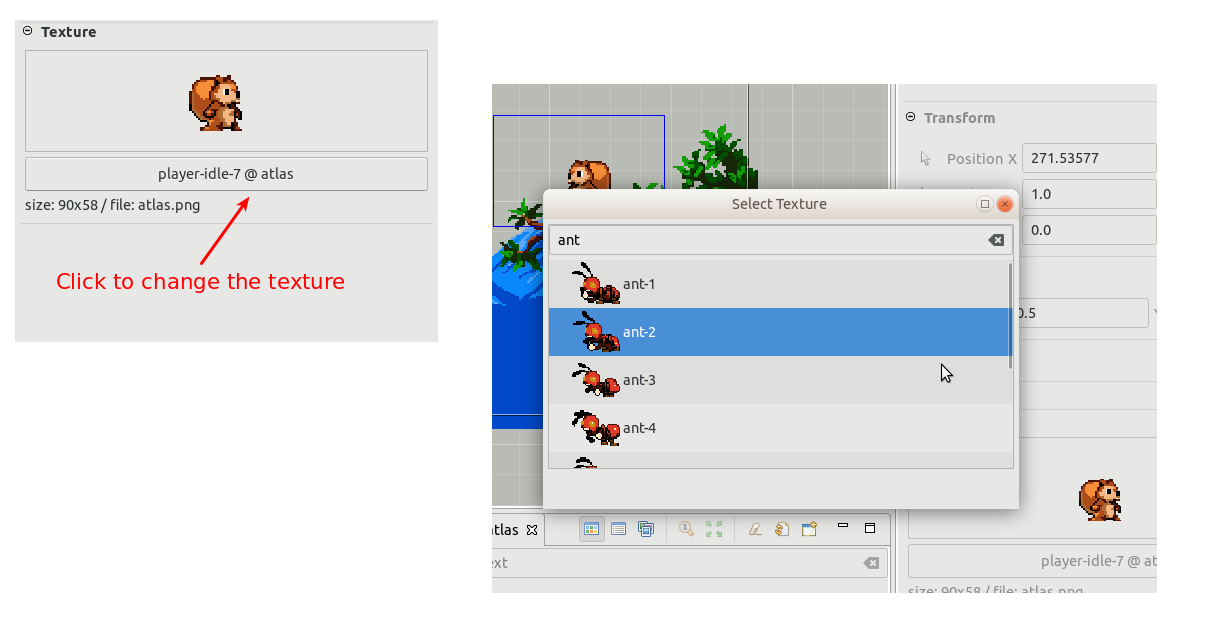
When you drop a texture into the scene, a new Image object is created. The properties you can edit are grouped in the sections: Transform, Origin, Flip, Visible and Texture. With the time we are going to add more components.
These properties are very simple to edit. The Texture section shows a preview of the texture of the Image and a button with the key of the texture. You can press the button to open a dialog with all the textures (images, spritesheet frames and atlas frames) and select a new texture for the Image object.
You can morph an Image into a Sprite or TileSprite.
Sprite game object
From the Phaser docs:
“A Sprite Game Object is used for the display of both static and animated images in your game. Sprites can have input events and physics bodies. They can also be tweened, tinted, scrolled and animated.
The main difference between a Sprite and an Image Game Object is that you cannot animate Images. As such, Sprites take a fraction longer to process and have a larger API footprint due to the Animation Component. If you do not require animation then you can safely use Images to replace Sprites in all cases.”
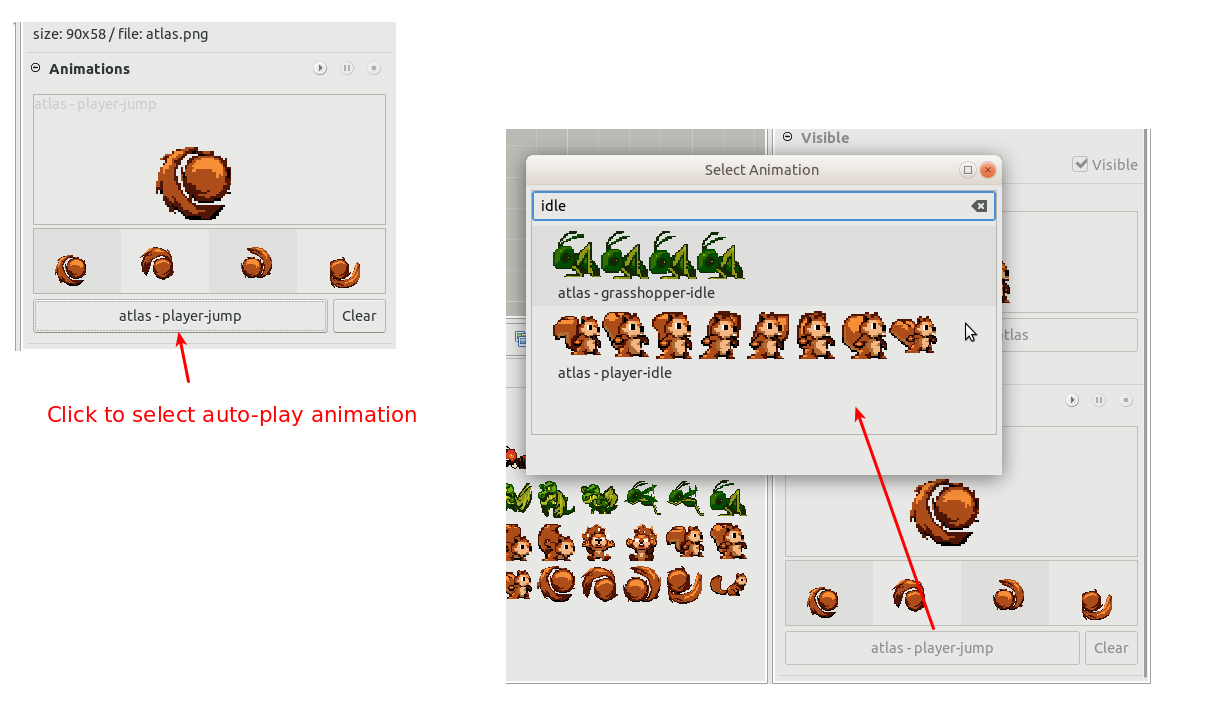
The properties of the Sprite game object are grouped in these sections: Transform, Origin, Flip, Visible, Texture, Animations.
The Animations allows you to select an animation to be auto-played after the sprite is created. In Phaser v3, the animations are global objects, so Phaser Editor v2 provides an animations editor that generates a JSON file that can be loaded in the game (manually or via the Asset Pack).
This auto-play animation is not part of the Phaser v3 API, it is an option we provide in the editor.
In this video, you can see how to create the global animations and how to set an auto-play animation to a sprite: https://www.youtube.com/watch?v=MhLslypR2vU
TileSprite game object
To create a TileSprite object you can morph any other Sprite or Image. We should implement a command to do this quickly, like L in v1.
The properties you can edit are grouped in the sections: Transform, Origin, Flip, Visible, Texture and Tile Sprite. The Tile Sprite section contains the specific properties of this kind of object (Tile Position, Tile Scale, Tile Size):
![]()
In v1 you can change the size of the tile sprite with the mouse, yet in v2 it is not implemented.
BitmapText game object
To create a BitmapText, drag a BitmapFont from the Assets window and drop it into the scene.
These are the property sections we implemented for BitmapText: Transform, Origin, Visible, Text and Bitmap Text.
The Text and Bitmap Text sections are specific of the Bitmap Text game object:
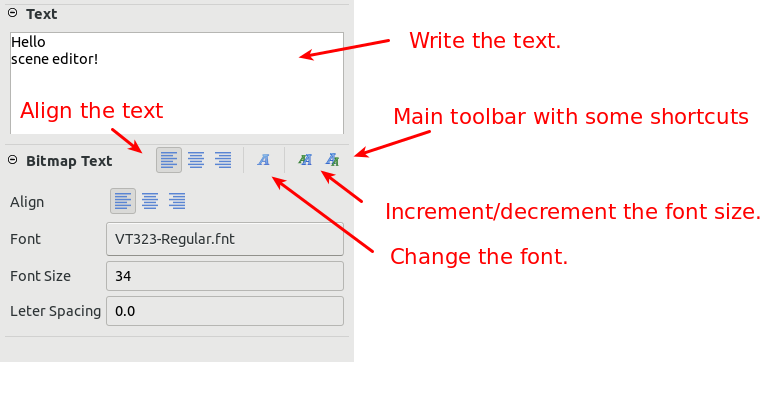
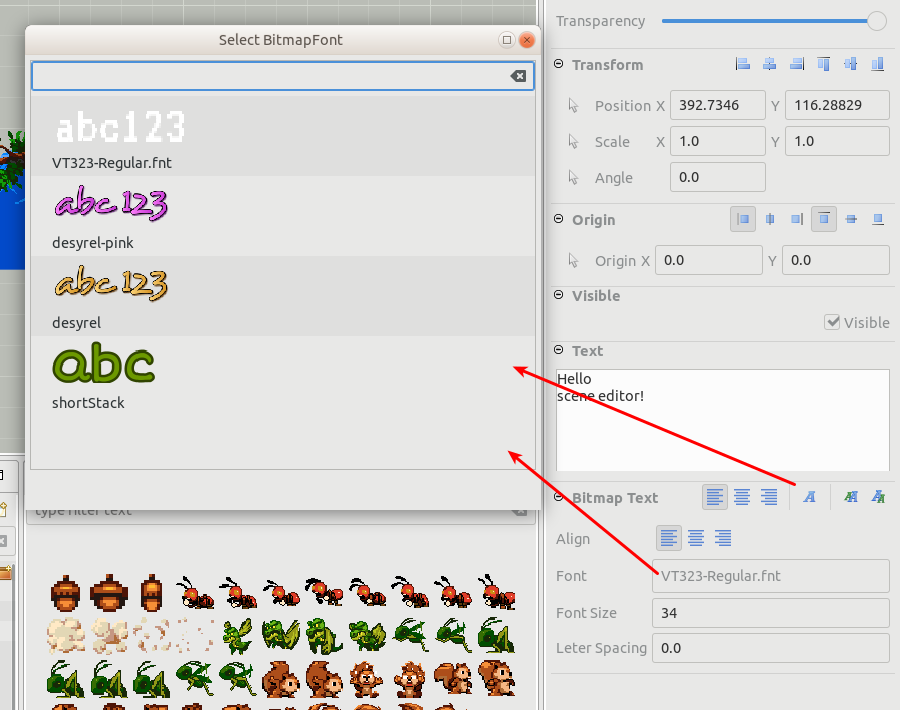
When you press the “Change font” icon or press the Font button, it opens a dialog with all the BitmapFont of your project (defined in the asset packs):
DynamicBitmapText game object
From the Phaser v3 docs:
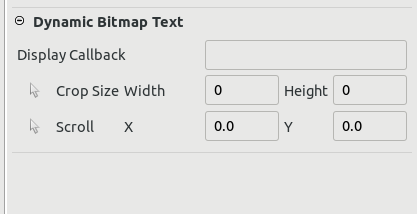
“Dynamic Bitmap Text objects are different from Static Bitmap Text in that they invoke a callback for each letter being rendered during the render pass. This callback allows you to manipulate the properties of each letter being rendered, such as its position, scale or tint, allowing you to create interesting effects like jiggling text, which can’t be done with Static text. This means that Dynamic Text takes more processing time, so only use them if you require the callback ability they have.”
To create a DynamicBitmapText first create a BitmapText and then morph it.
These are the specific properties of the DynamicBitmapText:
Missing object types
There are a lot of object types that are not supported, but for the first release we do not plan to include all of them, we think that maybe we will add just containers and groups.
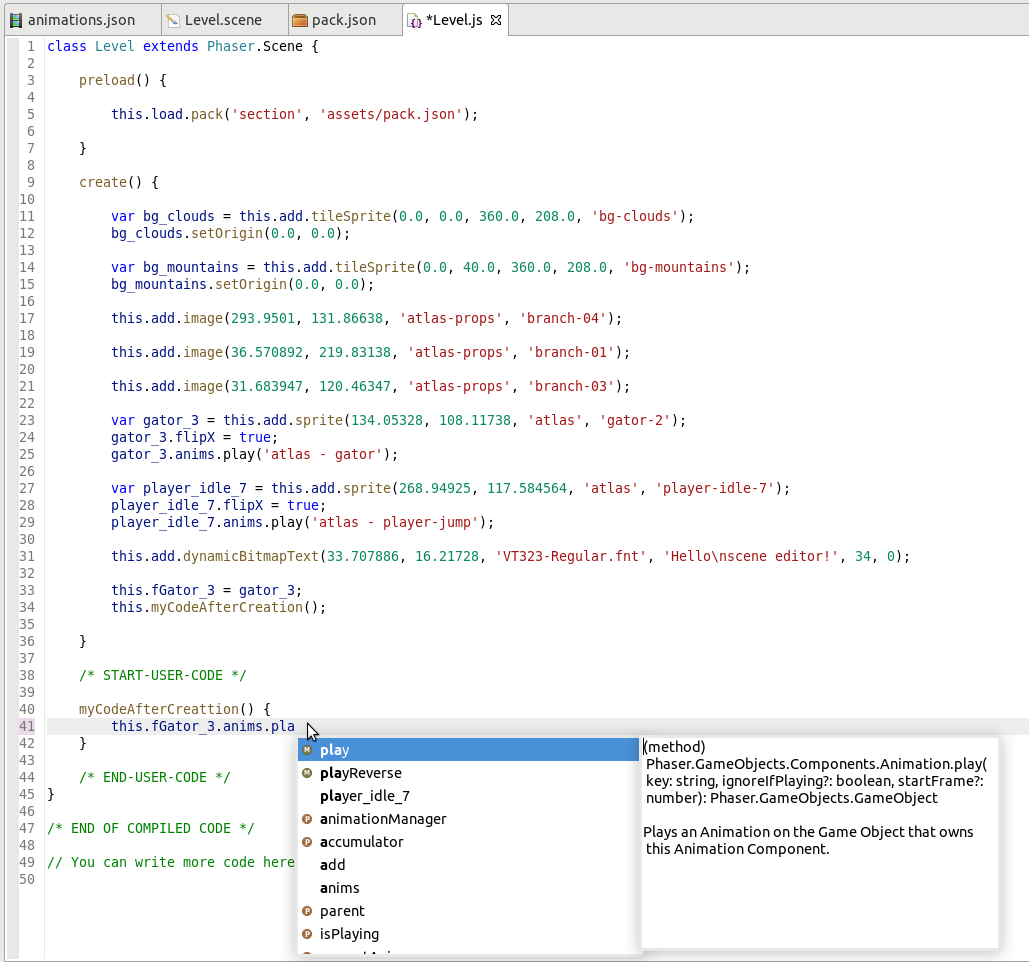
Code generation
As in v1, in v2 we compile the scene file into JavaScript code. At the moment, only JavaScript 6 is supported, but JavaScript 5 and TypeScript should be supported in the future (as in v1).
For now, we are generating a Phaser.Scene code, but for the first release we should generate another thing, maybe a custom container or a factory method, let’s see, we have to think more about it, it depends on how Phaser will implement containers in the next releases. But the final solution, as in v1, will provide the option of compiles the editor scene files into Phaser.Scene, Phaser.GameObjects.Sprite, Phaser.GameObjects.Image, Phaser.GameObjects.Container, etc… And make an intensive use of prefabs.
This is an example of the generated code:
Scene properties
If you do not select any object of the scene, then the Properties window shows the properties of the scene:
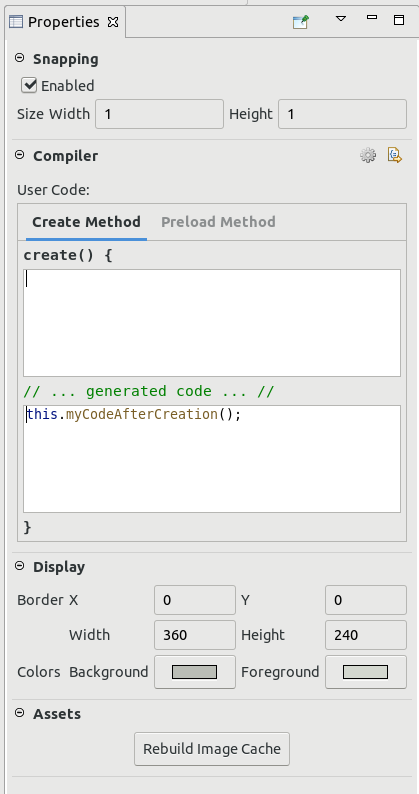
Like in v1, you can change the snap values of the editor. The code to be inserted into the scene compilation, and some properties with the scene colors. We should keep adding more properties there, like the kind of code we want to generate (language and type -Scene, Sprite, Container, etc…-).
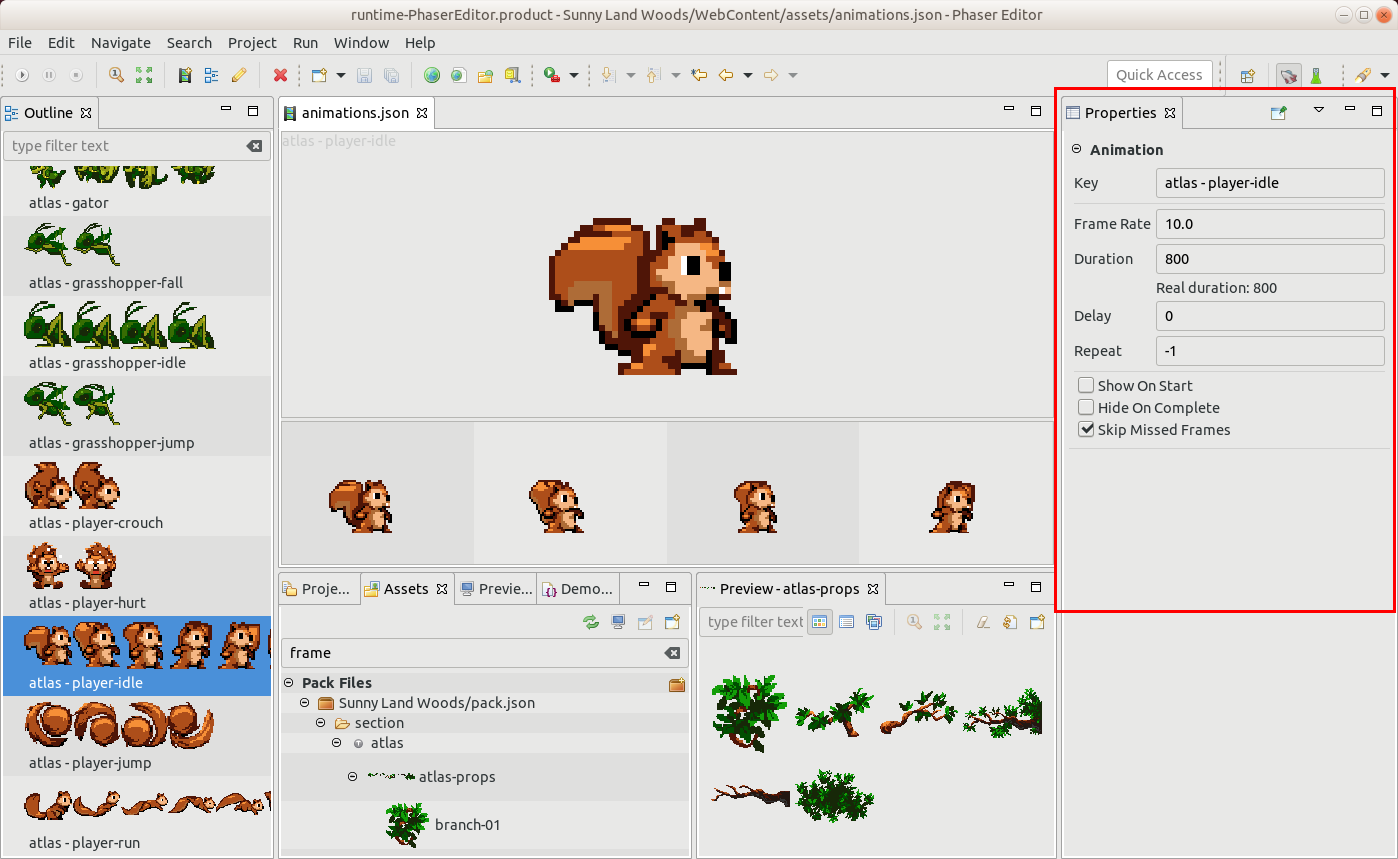
Animations editor
The Animations editor now uses the form-based editor for the animations and frames properties, just like the Scene editor does. We should do the same with the Asset Pack editor and the Texture Packer editor.
Phaser Labs perspective
The new Phaser Labs perspective introduced in v2, contains some windows related to the Phaser API and the Phaser official examples. We worked a bit more on these windows.
- The representation we do of the Phaser API is more accurate.
- All windows (Chains, Phaser Types, Phaser Files, Phaser Hierarchy, Jsdoc) contain a toolbar with the commands “Show in Hierarchy”, “Show Source Code” and “Show Documentation”.
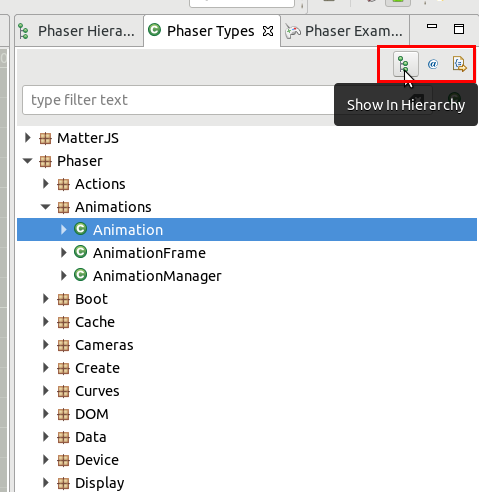
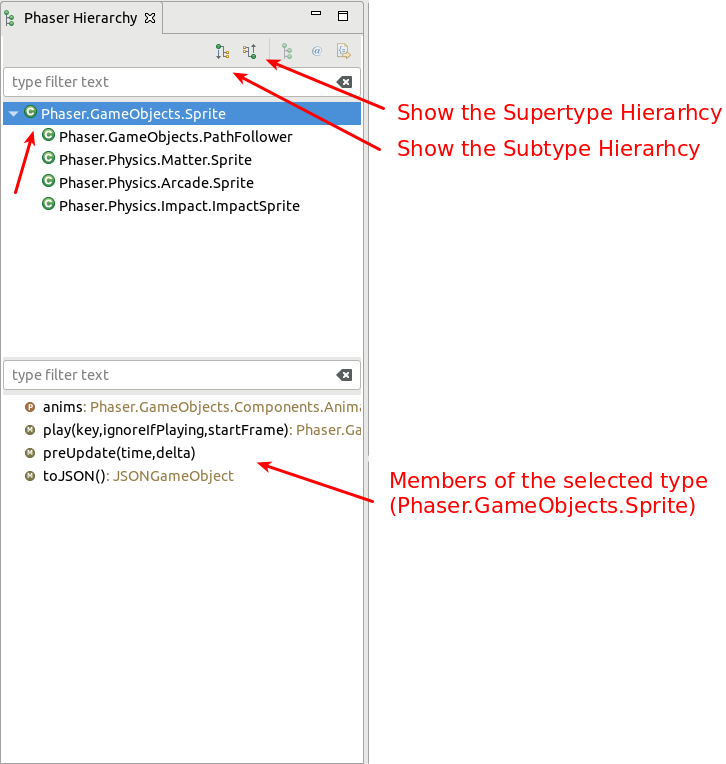
Phaser Hierarchy window
The Hierarchy window received some love. It is divided into two panels, the top panel has the hierarchy of types and the bottom panel the members of the type selected in the top panel. In addition, we added two new commands to the toolbar: “Show the Subtype Hierarchy” and “Show the Supertype Hierarchy”. These commands allow you to move on the hierarchy of types quickly.
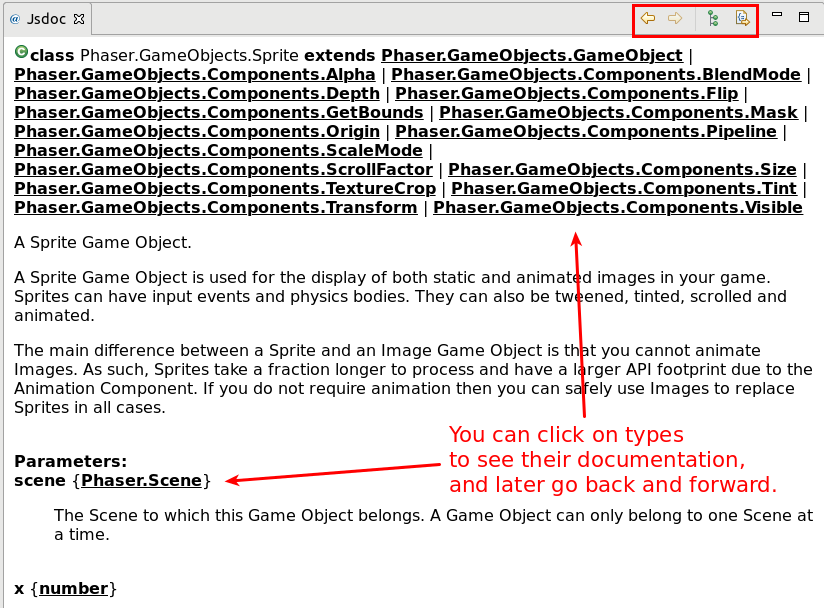
Jsdoc window
The Jsdoc window is used to show the documentation of a Phaser API member that is selected in any other window. We added the commands “Show Hierarchy” and “Show Source Code”, that works like in the other windows. In addition, we added navigation commands, to move in the history of members displayed in the Jsdoc. This allows that you click on a link (for example a method return type) in the documentation to see the content of that link, but later you can go back to the previous content.
Keep in touch!
Arian
Tags: report, v2, scene, animations